

Postmark Integration: setup and help
Quick start
- Upload and install the module ZIP through the PrestaShop module manager.
- Open the module configuration and select one shop. Group and all-shop configuration are not accepted.
- Prepare an existing Postmark server with SMTP enabled and an active outbound Transactional stream. Configure sender authentication in Postmark for the shop’s sending address.
- Publish the DNS records supplied by Postmark at your DNS provider, including when using Cloudflare. The module does not publish DNS records.
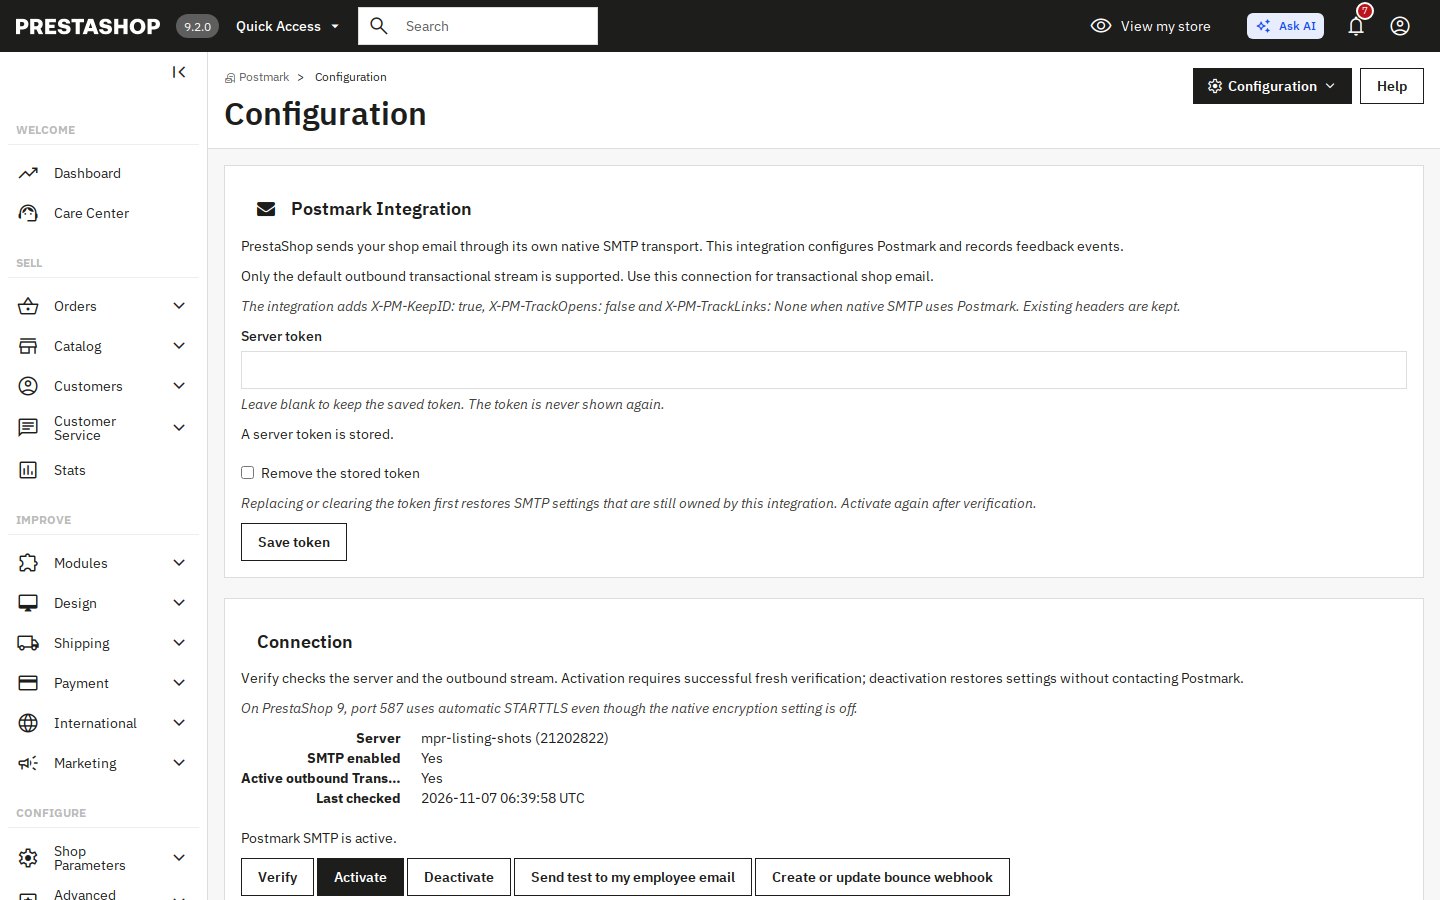
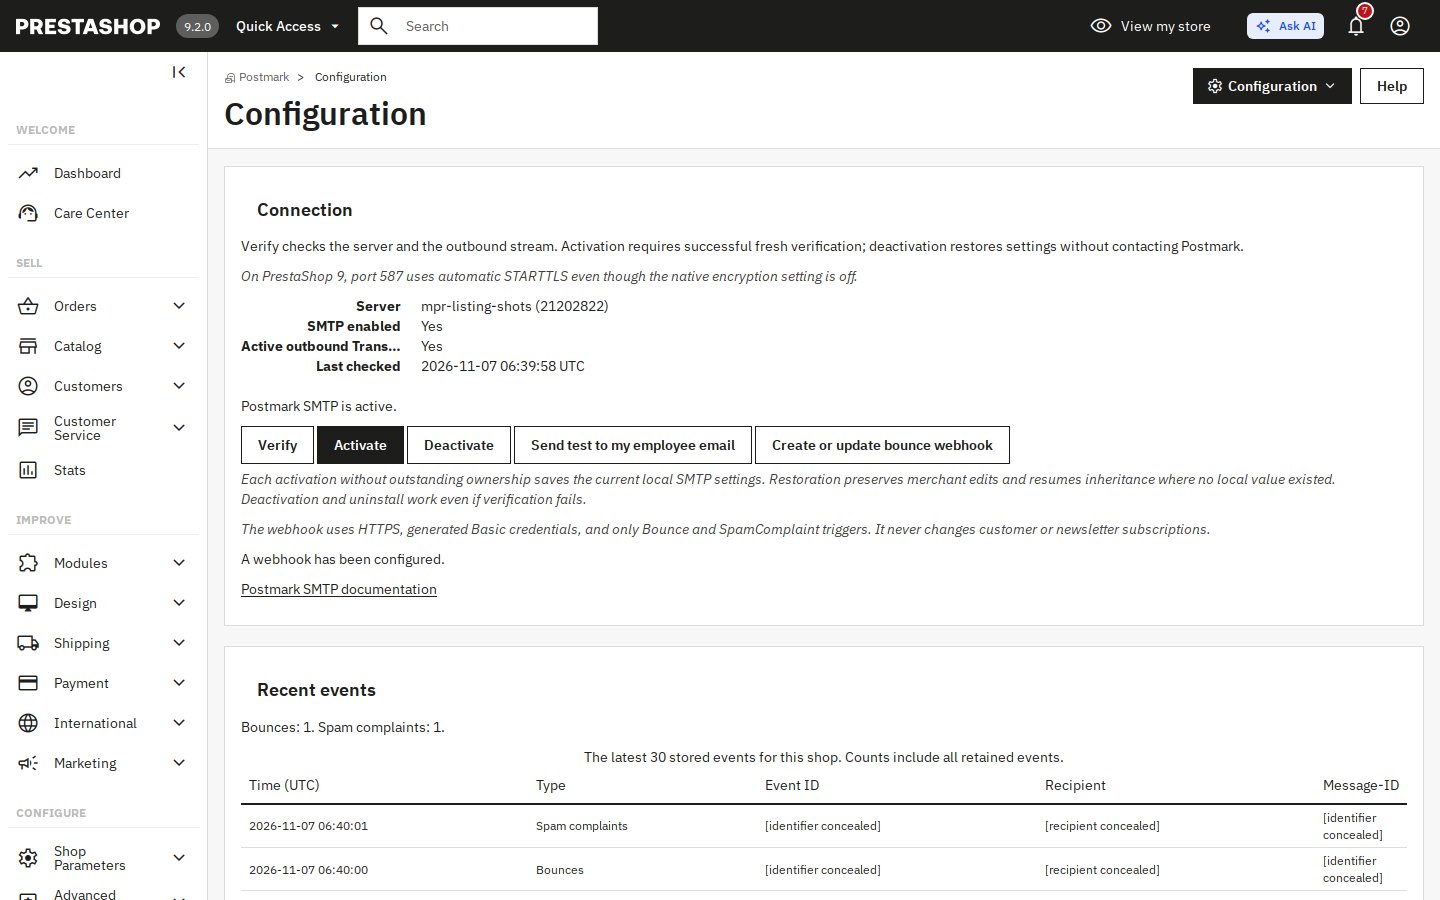
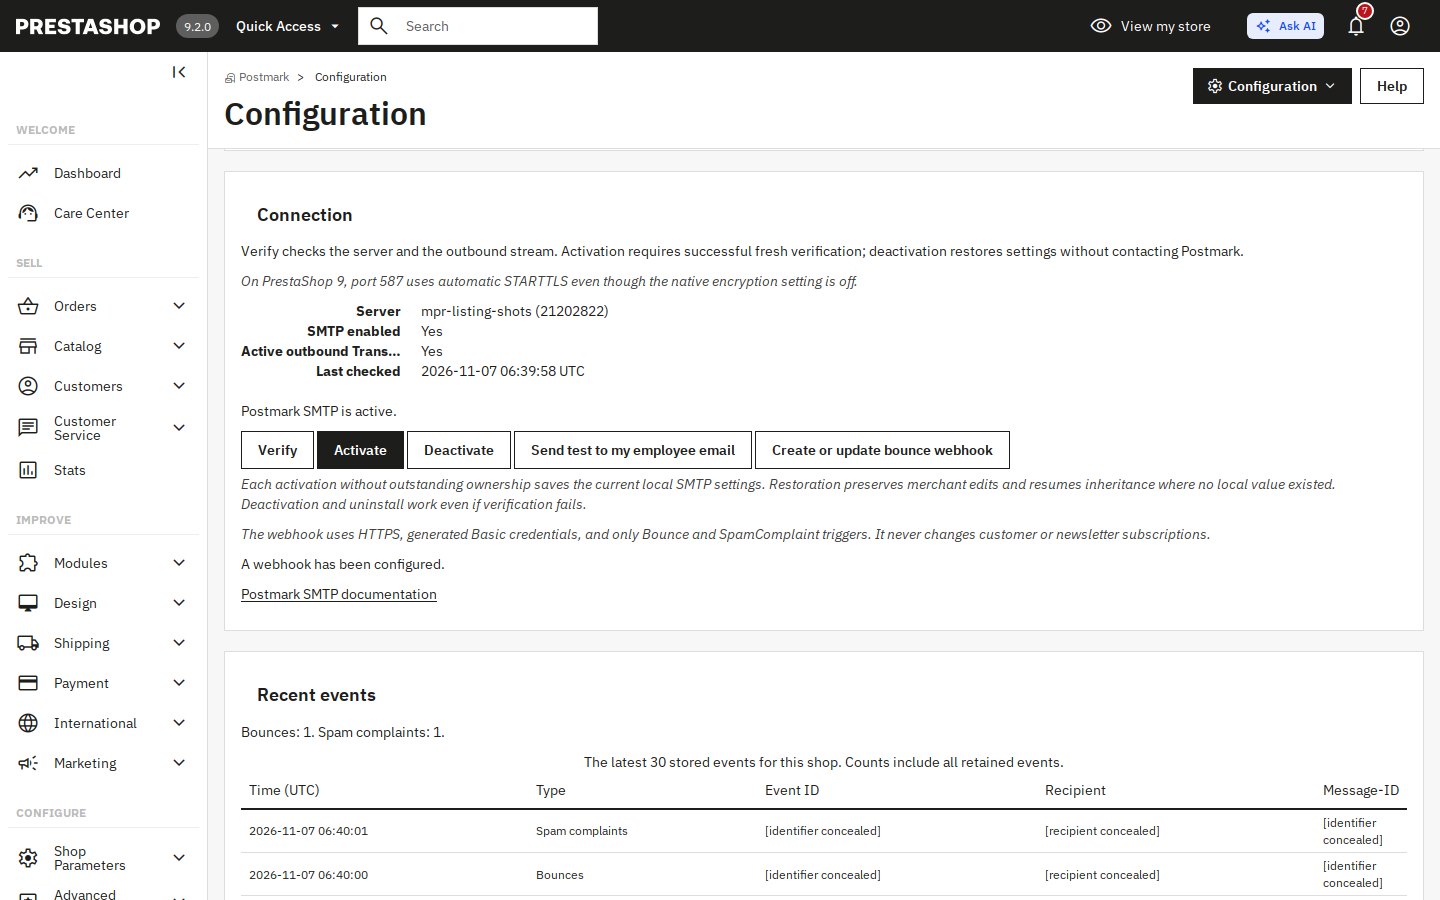
- Save the Server token, use Verify, then Activate. Use Create or update bounce webhook separately; a configured webhook is not required for activation.
- Use Send test to my employee email, review the result and inspect the mailbox of the employee who starts the test. Acceptance for sending and receipt are different outcomes.
- Exercise an ordinary shop notification as well, using the shop’s own template and intended sender.
Setup manual
Postmark Integration connects native PrestaShop mail to Postmark SMTP and records Bounce and SpamComplaint feedback for the selected shop. This guide covers server-token setup, manual DNS, native sending and the event report.
Features
- Simple setup. A Postmark server token connects an existing sending server.
- Sender-domain checks. DNS checks inspect the sending domain’s DMARC policy and Return-Path CNAME.
- Manual DNS option. Copy the domain records from Postmark to your DNS provider.
- Native shop email. PrestaShop continues preparing order and account messages, with Postmark handling sending.
- Failure feedback. Bounces and spam complaints are recorded in the back office.
- Test and control. A native test email and restoration of owned mail settings help you manage the switch.
Configuration options
Account token and sender domain
The connection uses a Postmark server API token from an existing server. The module reads the effective PS_SHOP_EMAIL of the selected shop for DNS checks. A shop at shop.example.com sending as orders@example.com uses example.com. A valid shop email address is therefore part of setup.
Copy the server token into Server token yourself. Callback authentication is generated by Create or update bounce webhook. Replacing or clearing the saved token first restores owned native mail settings and clears verification and webhook status; verify and activate again. Changing the shop email domain does not automatically deactivate SMTP.
Cloudflare or manual DNS
DNS publication is manual at every provider, including Cloudflare. Obtain the sender-domain records in Postmark and publish them at your DNS provider. The module has no Cloudflare connection or DNS editing action.
Verify checks SMTP availability and the active outbound Transactional stream. DNS checks read DMARC and Return-Path; they do not query Postmark’s domain-verification status. A quarantine or reject DMARC policy with no matching Return-Path requires your confirmation that the domain is verified in Postmark before activation. Webhook configuration is a separate action.
Customization examples
A domain managed outside Cloudflare
Use the public records from your domain setup in Postmark in the DNS editor of your provider. This is a shape example, not a working DKIM value:
TXT   <selector>._domainkey.example.com   <DKIM value supplied by Postmark>
CNAME pm-bounces.example.com             pm.mtasv.net
Copy the exact names and values from your own domain setup in Postmark. DNS editors differ in whether they expect a full name or only the label before the zone name. The Return-Path CNAME must be DNS only, with proxying off. This example does not replace an existing SPF or DMARC policy, and the module does not generate those policies.
Installation
Requirements
- General range: PS 1.6 – 9.x. The module declares PrestaShop 1.6.1.0 as its exact minimum.
- PHP 7.1 or later, also compatible with the installed PrestaShop version.
- PHP cURL and JSON. API calls have a 5-second connection timeout and a 20-second total timeout.
- A Postmark account, an existing server with SMTP and an active outbound Transactional stream, and its server token. Postmark is a paid service with its own plans; the module is free.
- A valid shop sending email, access to its DNS provider and a publicly reachable HTTPS callback route.
- Publish sender authentication records manually at your DNS provider, including Cloudflare.
An employee needs access to the selected shop and native view permission to read configuration; changes require edit permission too. Keep credentials out of screenshots and shared examples. With multiple shops, configure and check the intended shop rather than assuming a connection has been applied to every shop.
How it works
Save the server token, verify the server and outbound stream, activate native SMTP, configure the webhook and send a test using separate actions. The module uses the shop’s native sending system and its authenticated event receiver.
How does Postmark Integration help with missing order emails?
Postmark Integration connects the messages your shop already produces to Postmark’s transactional sending service. Configure sender authentication in Postmark yourself, then connect the shop using the existing server token. You retain the email content prepared by PrestaShop and receive feedback when Postmark reports a bounce or a recipient marks a message as spam.
How are the sender domain records handled on Cloudflare?
Publish the sender-domain records from Postmark manually in Cloudflare, with the Return-Path CNAME set to DNS only. The module does not edit Cloudflare DNS or query Postmark for domain verification. Its DNS checks use the shop’s sending email domain, which need not match the website address.
What if my domain uses another provider?
Use the DNS records from your domain setup in Postmark in your provider’s DNS editor. DNS publication is manual with every provider. The module does not supply DKIM values or publish the records.
Will my existing shop emails keep their content?
PrestaShop continues to prepare the message, its layout and its attachments. The module changes the shop’s sending settings to Postmark rather than designing new templates. Messages from other modules follow the same route when they use native PrestaShop email.
How do I know when an email has failed?
The back-office report lists the bounces and spam complaints Postmark sends back, with the recipient, time and message reference. Your team has a record to consult when a customer says an expected message never arrived, rather than relying only on a successful sending response.
What does the test email confirm?
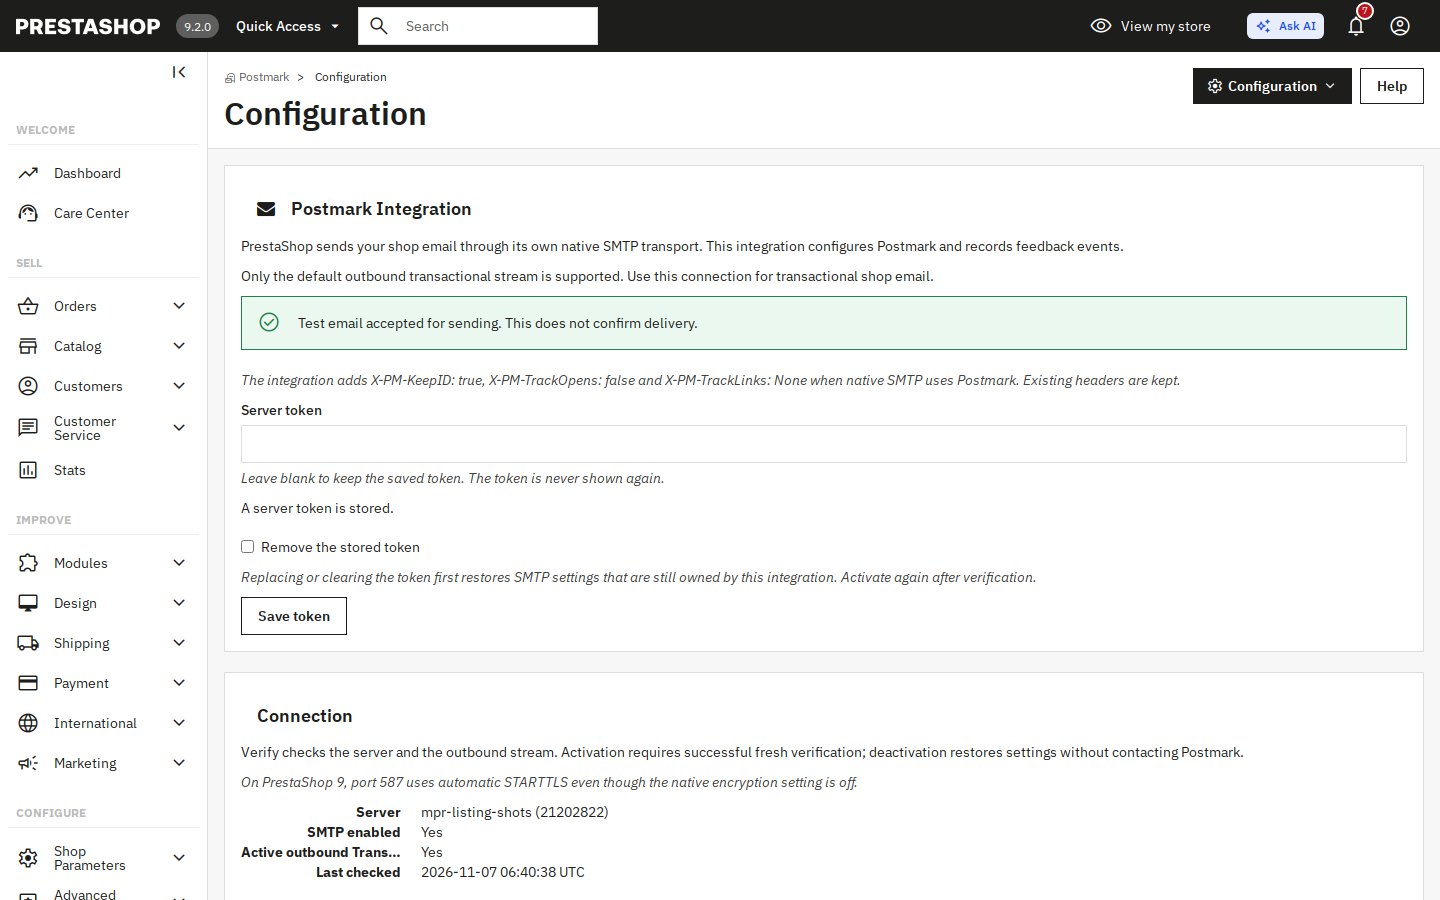
The test uses native PrestaShop mail and the module’s test template. It goes to the employee who starts the test, so the result exercises the sending route the shop will use. The sending response and the received email are separate checks.
Native route and tracking controls
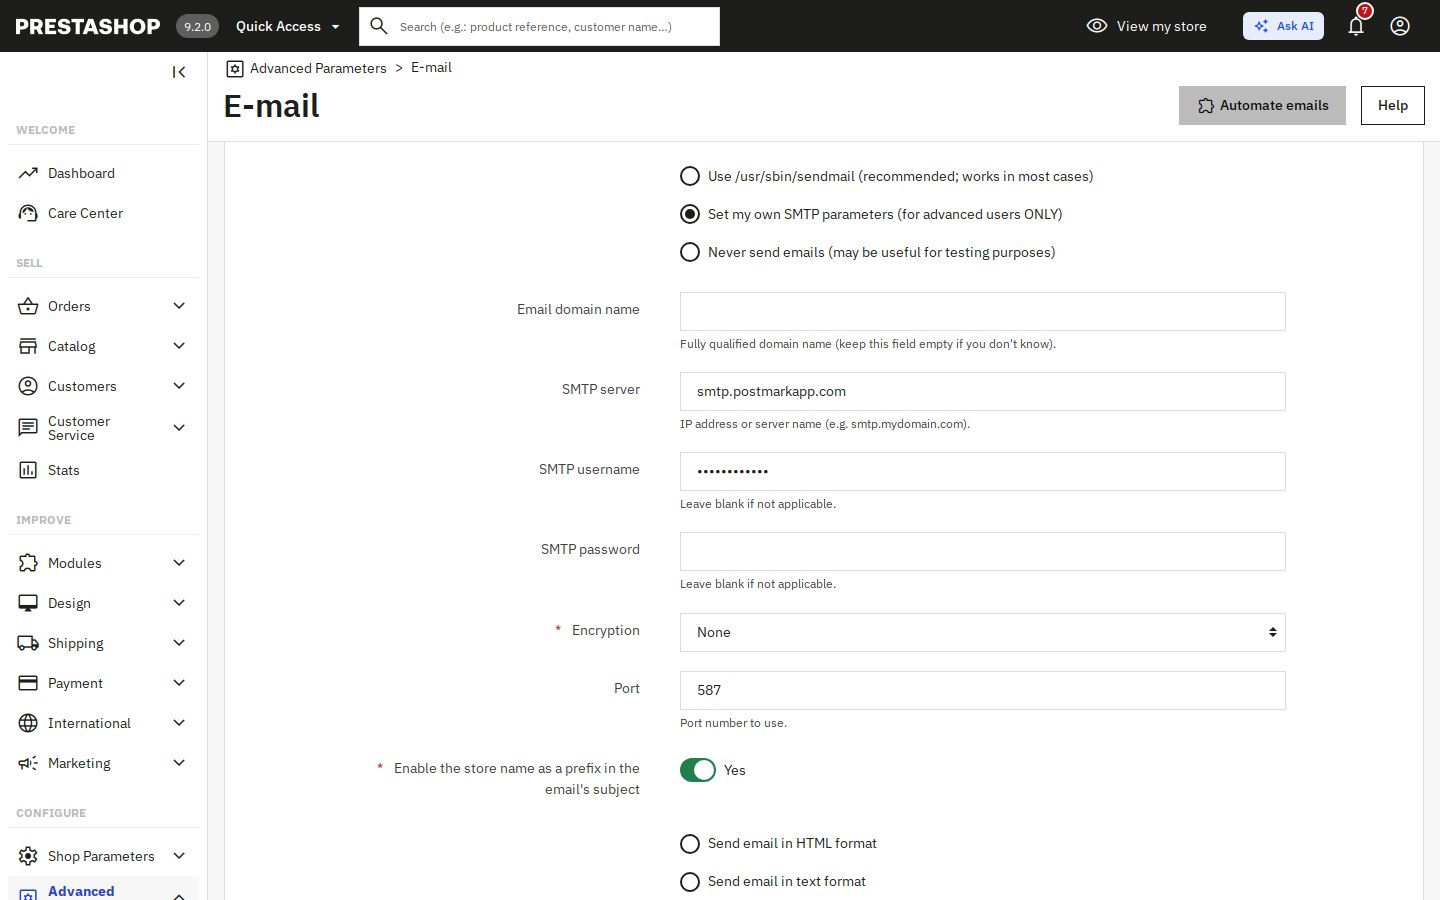
Activation writes PS_MAIL_METHOD=2, PS_MAIL_SERVER=smtp.postmarkapp.com, port 587, and the saved server token as both username and password. PrestaShop 1.6 through 8 uses tls; PrestaShop 9 uses off in the native setting to permit automatic STARTTLS. That version-specific setting does not mean the connection is intended to be unencrypted.
On PrestaShop 1.7.6 and later, absent headers receive X-PM-KeepID: true, X-PM-TrackOpens: false and X-PM-TrackLinks: None. Existing headers are retained. Earlier releases use Postmark server defaults because they lack the final-message hook. Verification warns if server tracking is enabled; it does not change those defaults. Another extension’s explicit per-message header is not overwritten.
Event storage and sender checks
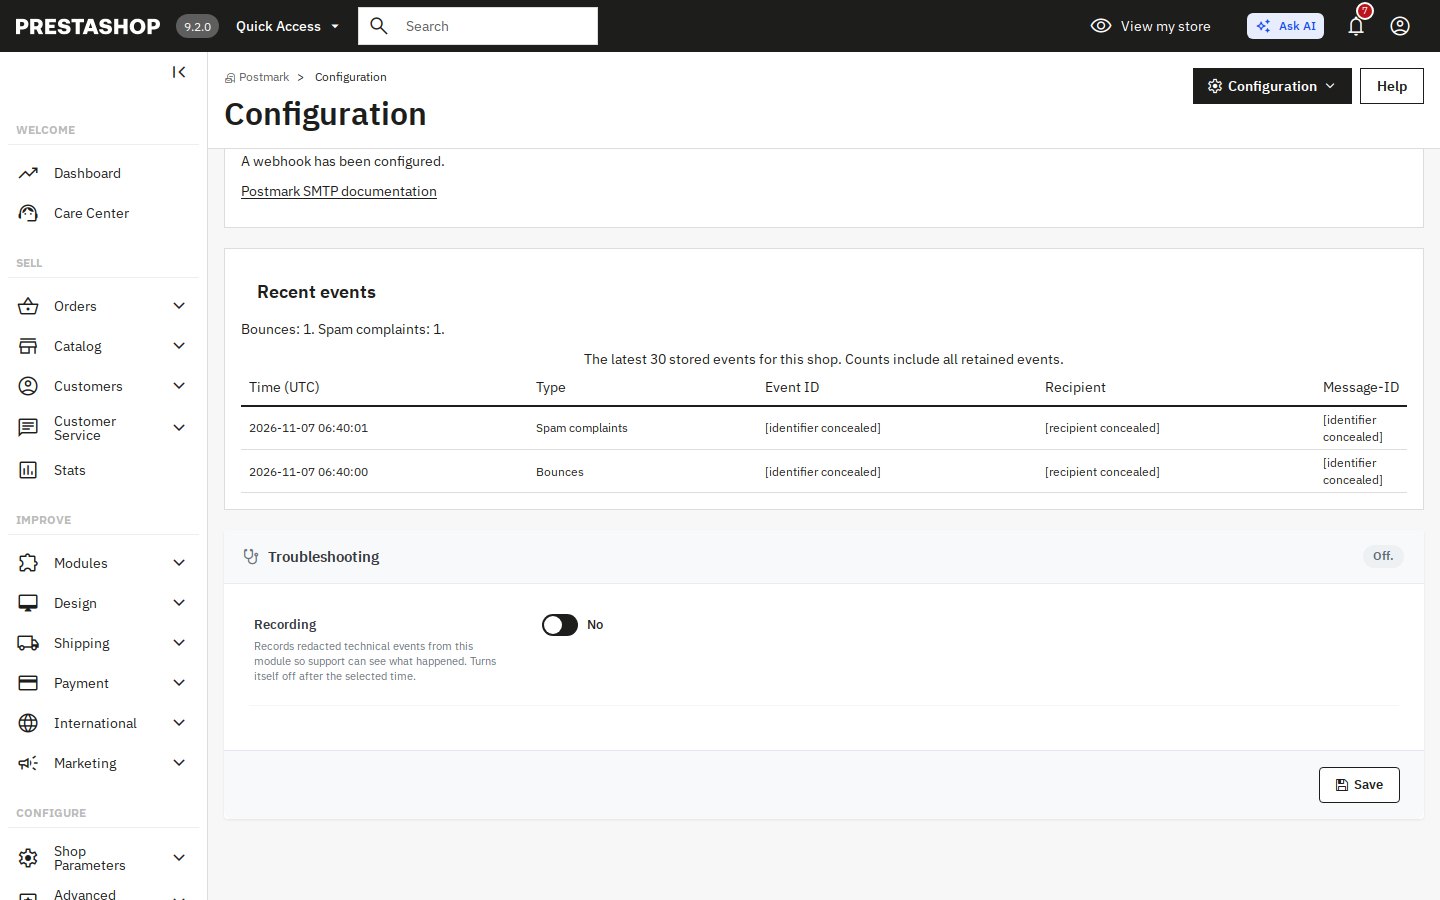
Authenticated feedback must match the saved server and outbound stream. The receiver accepts Bounce and SpamComplaint, stores normalized details and deduplicates repeated provider events. The report shows the latest 30 records and retained totals for the selected shop, with UTC time, recipient, provider event ID and Message-ID.
On PrestaShop 1.7.6 and later, the final-message hook checks the saved active flag and that the native mail method and host use Postmark before adding headers. It does not validate the message’s From domain or recheck server readiness or SMTP credentials on each send. Check sender authorization in Postmark yourself.
Honest limits
What sending success means
A native sending response establishes acceptance, not the final mailbox folder. No inbox-placement guarantee, delivery-rate percentage or Gmail/Outlook certification is offered. Domain authentication is part of setup, but does not override recipients’ filters. The built-in test is addressed to the employee who starts the test, not to an arbitrary address entered in a form.
The test calls native Mail::Send synchronously. There is no separate CLI worker or module-imposed send timeout, and no automatic resend. Check native mail settings and diagnostics if it fails. Ordinary sending still uses the native mail stack.
Scope and data
Only the default transactional outbound route is covered. There is no broadcast sender, newsletter campaign tool, selectable custom stream, template editor or automatic resend of bounced messages. A separate transport used by another module is outside this route.
Bounce and complaint events contain personal data, including recipient addresses and message references. The callback excludes email content and the module stores normalized event fields, not raw MIME content. The configured webhook has no Open or Click triggers. Mail tracking can still follow server defaults or existing message headers. This does not mean that no data is sent to Postmark: Postmark receives the mail it is asked to send.
Credentials are stored server side and not returned in the safe setup view. Do not describe them as application-encrypted. Access to the shop database is sensitive. The module does not change newsletter preferences or automatically reactivate a blocked Postmark recipient.
Domain and restoration boundaries
Configure DKIM and Return-Path in Postmark and publish their DNS records yourself. The module does not create or repair your complete SPF/DMARC policy, publish DNS records or check Postmark’s domain-verification status.
Deactivation restores only owned native values, preserving later merchant edits. It does not close the external account or remove remote Postmark resources. The integration leaves native message content and attachments alone; downstream provider processing is not a byte-for-byte preservation guarantee.
Troubleshooting
- DNS warning: check sender authentication in Postmark and publish its exact records at your DNS provider. Keep the Return-Path CNAME DNS only.
- Sender rejected: check that the shop or module’s actual sender is authorized in Postmark. The website hostname alone does not determine the sender.
- Test accepted but no visible email: inspect the employee’s mailbox and spam folder. Consult reported bounce/complaint details where available. An empty event list does not prove delivery.
- No feedback received: check the public HTTPS callback and authentication header forwarding. Opening the URL in a browser is not an authenticated event.
- Mail settings changed manually: review native configuration and connection state. Restoration preserves merchant edits.
- Provider or permission error: resolve the reported server-token, SMTP or outbound-stream issue before retrying. Local deactivation does not need a working provider API.
Questions
7
Is Postmark Integration free?
The module is free. Postmark service plans are billed separately.
What do I need to start setup?
An existing Postmark server with SMTP enabled and an active outbound Transactional stream, its server API token, and a valid shop sending address authenticated in Postmark.
Do I need Cloudflare?
No. Publish the sender-domain DNS records from Postmark manually at your DNS provider, including Cloudflare. The module does not publish DNS records or supply DKIM values.
Which emails use Postmark?
After activation, native PrestaShop mail uses Postmark SMTP, including order, account and module notifications. Independent sending systems are unaffected. Use this connection for transactional email; custom Postmark streams are not selectable.
Does it track email opens or clicks?
On PrestaShop 1.7.6 and later, missing headers are added to request no open or click tracking; existing headers take precedence. Older releases use Postmark server defaults. Verification warns about enabled server tracking but does not disable it.
Does a successful test guarantee inbox delivery?
No. The test goes to the employee who starts it and reports native sending acceptance, not delivery or inbox placement. The event report contains bounces and spam complaints, not delivery confirmations.
What happens when I deactivate the connection?
The module restores mail settings that still contain the values it wrote. Later merchant edits are preserved. Restoring local settings does not depend on Postmark being available. Deactivation does not cancel your Postmark account or delete its remote server and domain.
Known Issues
No known issues
There are currently no open or resolved issues registered for this module.
Feature Requests
No feature requests for this module yet
Missing something? Suggest it, and follow its progress here.
Changelog
v1.0.02026-11-07
- Initialrelease.
- InitialConfigure native PrestaShop transactional mail to use Postmark SMTP for the selected shop.
- InitialVerify and activate saved server credentials; restore owned mail settings while preserving later merchant edits.
- InitialRecord authenticated Bounce and SpamComplaint feedback with recent events and retained totals.
- InitialSend a native test to the initiating employee; distinguish acceptance, unknown outcomes and receipt.
- InitialOne-click account-token setup and its DNS workflow are planned for 1.1.0 under FUTURE PM-UI-1.