

Module Updates & Remote Assist: setup and help
Quick start
- Download the free Module Updates & Remote Assist ZIP and install it through the module manager in your PrestaShop back office. This is the initial module installation; later installations of your owned modules start from Modules.
- Open mypresta.rocks > Settings > Configuration. In multistore, select the individual shop you want to connect before proceeding.
- Sign in to your account on mypresta.rocks and copy the one-time connect code, valid for 10 minutes. Paste it into Connect code in Configuration and choose Connect. Your account password stays on mypresta.rocks. The same code flow works without HTTPS on every shop page.
- Return to the back office and open mypresta.rocks > Modules. Review the modules owned by the linked account and their state in this shop.
- Choose the installation action for a module you own, or Update to v… when an eligible update is available. Follow the operation through to its final status. If recovery requires review, use the safety guidance before starting another attempt.
The module itself is free. Linking the account grants account access only. It does not authorize remote support access or activate paid modules. After linking, you choose the action for a particular module in Modules.
Setup manual
Module Updates & Remote Assist is a free PrestaShop module with a lifetime licence. It connects the selected shop to your mypresta.rocks account so you install and update modules you own from the back office. This manual follows the current Configuration and Modules screens. Start with the requirements if the module is not installed yet.
How do I link my account to this shop?
Open mypresta.rocks > Settings > Configuration in the back office of the selected shop. Sign in on mypresta.rocks, copy the one-time connect code and paste it into Connect code on this screen, then choose Connect. Your mypresta.rocks password belongs on that website; you do not type it into a module form in the shop.
Browser approval
Sign in on mypresta.rocks using the account whose modules you want to manage and copy its one-time connect code. After entering it in Configuration and choosing Connect, check the connection before moving to Modules. There is no separate browser-approval flow in this release.
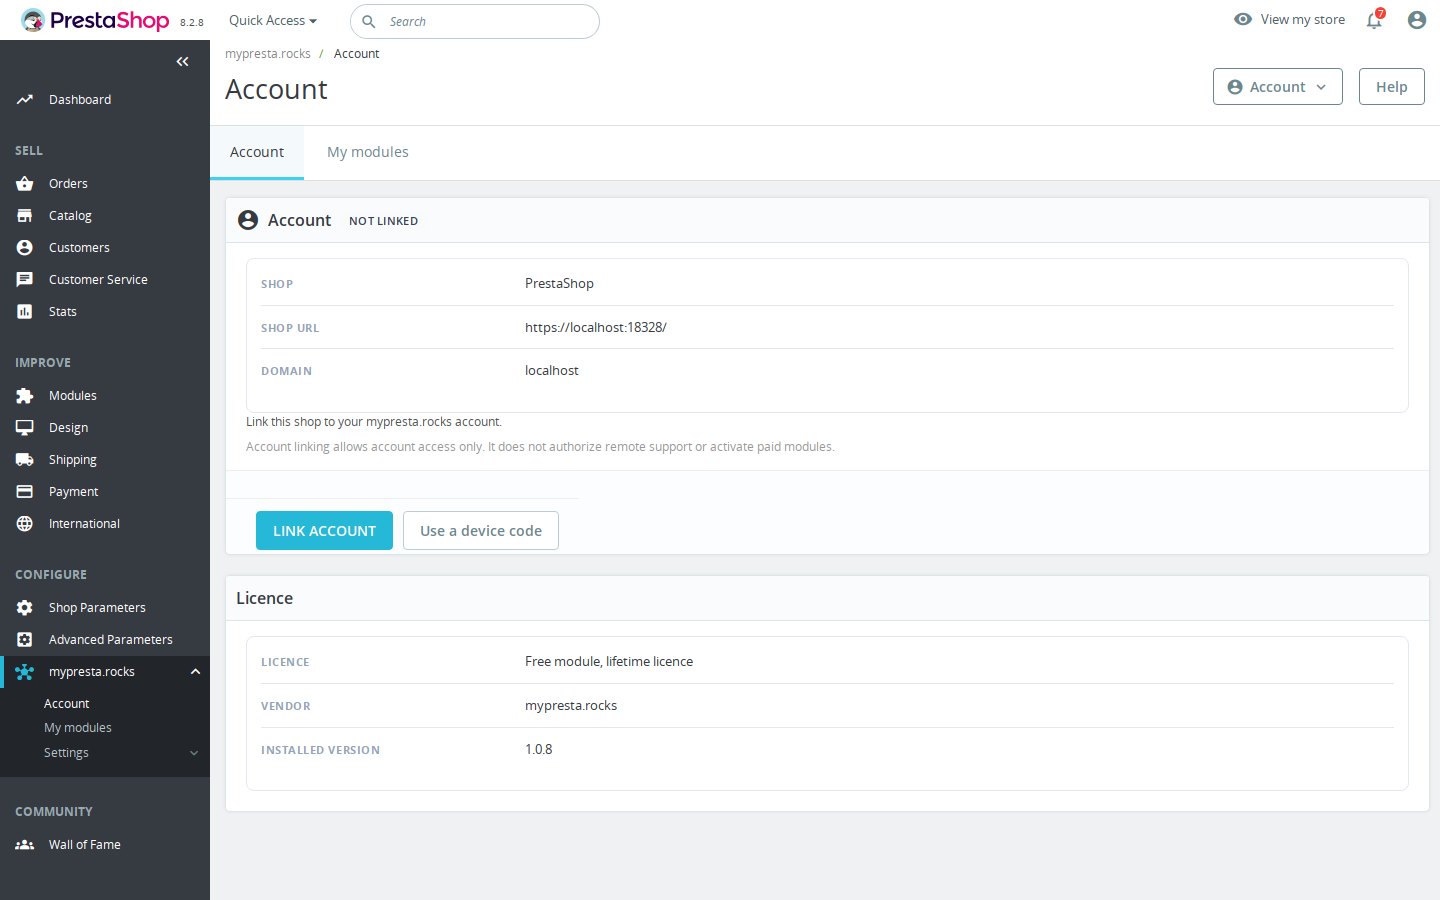
Linking with a device code
Shops without full HTTPS use the same one-time connect code. Copy it from your signed-in mypresta.rocks account page, enter it in Connect code in Configuration and choose Connect. Codes expire after 10 minutes and can be used only once. Get a new code if the previous one has expired or been used.
Selecting the right shop and account
Each shop in a multistore installation is linked separately. Repeat linking for each shop you want to connect. Before approving, check which shop is selected and which mypresta.rocks account you are using. The list includes the public catalogue and licences from that linked account, with the state for the selected shop.
Linking grants account access only. It does not grant remote support access, and it does not activate a paid module merely because that module appears in the account. To remove the connection, use the disconnect action on Configuration. The removal procedure starts with that action.
How do I install modules from My modules?
Open mypresta.rocks > Modules after linking. This page shows the module catalogue and licences owned by the connected account; free modules and 30-day demos need no account. Read the module state in the selected shop before choosing an action: a module that is not installed needs a different action from one with an available update.
Reading the list
The list identifies modules that are not installed in this shop, shows installed versions and marks available updates. Latest version appears when no newer eligible release is available. It is the licence attached to the module that determines the relevant release, rather than the act of linking the module.
Access labels describe free modules, demos and licences. Install demo can start a 30-day trial without an account. Use the information on the module's own row when deciding what to install or update.
Choosing the installation action
For a module you own, use the action available on its row. Install with your licence installs with the owned licence. Install installs a free module; Install demo installs a demo. Update to v… handles an eligible newer version; it is covered in the updates chapter.
Module Updates & Remote Assist downloads the module and verifies the download before installation. You do not first download that module's ZIP onto your computer or upload it to the shop. The initial Module Updates & Remote Assist ZIP is the separate setup step that makes this workflow available.
Follow the operation status after starting it. An operation that has begun still needs to reach its final result. If it stops or asks for recovery review, use the safety chapter and inspect the current state before making another installation attempt.
How do I update an installed module?
Open Modules in the shop you intend to update. Check the installed version and the update state on the module's row. Choose Update to v… when the row offers an update under the module's licence. Module Updates & Remote Assist handles that module's download, verification and update from the back office.
Before starting
Confirm the selected shop and the module you intend to change. The list's licence state matters: an update must be covered by the licence used in this shop. An update covered by another licence requires a licence choice. Linking the account is separate from installing, activating or updating its modules.
Before replacing files during an update, Module Updates & Remote Assist takes a backup of the current version. The incoming download is verified before it is installed. These safeguards belong to the update operation itself, rather than requiring you to transfer the ZIP manually.
Following the result
Follow the operation status until the final result is available. If the update stops part way through, follow the displayed continuation or recovery action. Recovery may require your confirmation and a manual review. A recovery state still needs review if the screen asks for it; do not treat a started update as proof that the new version is installed.
After completion, review the installed version and module state in Modules. If the operation rolled back, check that outcome before deciding whether to try the update again. If review is required, follow the recovery guidance first.
What protects an installation or update?
Module Updates & Remote Assist verifies downloads before installing them. For updates, it backs up the current version before replacing files. If an install or update stops part way through, its state determines whether to continue or review recovery. Confirm recovery only after reviewing the affected modules and shops. The operation screen gives you progress and recovery information to review.
Verification and backup
Download verification takes place before installation. An update's backup concerns the current module version before its files are replaced. Keep these steps distinct when reading progress: verification of the download, installation or update, and the final result describe different points in the same operation.
Rollback and recovery review
A completed rollback and an operation still in recovery are different states. Check the displayed result after an interruption. If the screen calls for a recovery review, review the affected module and the operation information before attempting another install or update. Do not treat the existence of a backup as confirmation that recovery has finished.
Recovery can restore module files and reverse supported lifecycle changes, but it is not an unconditional automatic rollback. The manual does not replace the result shown for the particular operation. Use that result, together with the installed module state, to decide what needs attention. When recovery requires manual review, finish that review before restarting the module action.
What does my shop need?
The module requires:
- PrestaShop: 1.6.1 to 9.2.x.
- PHP: 7.1 to 8.4.
- PHP extensions: json, openssl, zip, curl, pdo and pdo_mysql.
- Private storage: a writable directory outside the public web roots, on the same filesystem as the modules folder. The default location beside the shop requires a writable parent folder; the hosting administrator can configure an alternative private location.
- Account connection: copy the one-time connect code from your mypresta.rocks account into Configuration. There is no separate device-code option.
Check the PHP version and extensions used by the shop with your hosting provider if needed. For default private storage, identify the shop's root first, then its parent folder. A writable modules folder alone does not provide the required private storage.
Use the connect-code procedure described under account linking, including when the shop does not have full HTTPS. Module Updates & Remote Assist's requirements and the account connection are separate checks: a connected account does not change the PHP version or folder permissions on the hosting account.
Where are the menu and integrity settings?
The back-office menu is mypresta.rocks, with Dashboard, Modules, Support access and Settings. Settings includes Configuration, System Integrity, License, Support and Update.
In Configuration, choose the menu placement. The mypresta.rocks entry has either its own top-level position or a position under a parent menu you select. Choose the location that fits the rest of the shop's back office.
Use System Integrity to review the available integrity information. Configuration is the place for the connection and disconnection; Modules is the place for owned module installations and updates. Before changing a module, check its row there, including its version and licence state.

What should I check when something stops?
- The shop will not link: check the selected shop and the account used on mypresta.rocks. Copy a fresh one-time connect code from mypresta.rocks into Connect code in Configuration and choose Connect. Codes expire after 10 minutes and work only once.
- An expected module is missing: check which account is linked in Configuration. Modules includes the public catalogue and the linked account's licences. In multistore, also check the individual shop you selected.
- The displayed update is not the one expected: read the installed version and the licence state on the module's row. Updates depend on the licence used in this shop; another licence may require an explicit choice.
- Installation or updating stops: read the operation result. Downloads are verified; a stopped operation may need continuation or a confirmed recovery review. Follow the safety chapter before another attempt.
- The hosting requirements are not met: ask the hosting provider to check the shop's PHP version, required extensions and private storage outside the public web roots on the same filesystem as the modules folder.
- The menu is in an unexpected place: review menu placement under Settings > Configuration. It may have its own entry or sit under the chosen parent menu.
How do I disconnect, disable or uninstall?
Disconnect the shop from mypresta.rocks > Settings > Configuration first. In a multistore installation, disconnect every linked shop separately before disabling or uninstalling Module Updates & Remote Assist.
After disconnecting, use the PrestaShop module manager to disable the module if you want it disabled, or choose the module's uninstall action to remove it. Keep the order clear: disconnect the linked shops first, then disable or uninstall the module.
This procedure concerns Module Updates & Remote Assist and its account connection. For a module installed from Modules, review that module's own state and instructions before making changes to it.
Questions
7
What is Module Updates & Remote Assist, and is it free?
Module Updates & Remote Assist is a free PrestaShop module with a lifetime licence. It links the shop to your mypresta.rocks account, then installs and updates modules you own from the back office.
Which modules does Module Updates & Remote Assist install?
The Modules page shows the public catalogue and your linked account's licences, with installed versions and eligible updates for the selected shop. Free modules and 30-day demos need no account; purchased licences require the owning account.
Do I enter my mypresta.rocks password in the shop?
No. Sign in on mypresta.rocks, copy the one-time connect code and enter it in Connect code under Settings > Configuration. Linking does not grant remote support access or activate paid modules.
What happens if an installation fails?
Downloads are verified, and updates back up the current files before replacing them. A stopped operation may need continuation or recovery with your confirmation and manual review. Check its final state before retrying.
What are the requirements?
PrestaShop 1.6.1 to 9.2.x, PHP 7.1 to 8.4, and json, openssl, zip, curl, pdo and pdo_mysql. Module operations need writable private storage outside public web roots, on the same filesystem as the modules folder.
How do I link a shop without full HTTPS?
Copy the one-time connect code from your signed-in mypresta.rocks account into Connect code under Settings > Configuration, then choose Connect. The same flow works without full HTTPS. Codes expire after 10 minutes and can be used only once.
How does linking work with multistore?
Each shop is linked separately. Select the individual shop, open Settings > Configuration and connect it with a one-time code from mypresta.rocks. Repeat for each shop you want to link, and check the selected shop when reviewing modules or updates.
Known Issues
No known issues
There are currently no open or resolved issues registered for this module.
Feature Requests
No feature requests for this module yet
Missing something? Suggest it, and follow its progress here.